Introduction
Ollama is a lightweight tool for running large language models (LLMs) like gpt-oss, Gemma, LLaMA, and more locally. It pulls model binaries, loads them into memory, and handles inference.
How it works:
- Ollama runs as a background service.
- You pull models from Ollama’s registry
- You run them either in CLI or via integrations like Open Web-UI
Title
The following guide assumes Linux environments (specifically Ubuntu 24 LTS running Ollama v0.11.3, with Nvidia GPU, and an Intel CPU). But the concept should be similar on other environments.
Get started
Ollama is designed to make downloading, running, and customizing models simple. The following guides you to install Ollama, verify GPU acceleration, set model download location, download and run models, manipulate model behavior with system instructions, and integrate with Open WebUI.
Installation
For automated installation, simply run:
curl -fsSL https://ollama.com/install.sh | shIf you have a Nvidia GPU, take advantage of GPU acceleration by download and installing CUDA from here. Then verify by running (should print details about your GPU):
nvidia-smiOllama should be running in the background by now. If it is not, start and verify by running:
sudo systemctl start ollama
sudo systemctl status ollama
In the future, if you consider to not run Ollama at startup but keep the installation, simply run:
sudo systemctl stop ollama
sudo systemctl disable ollama
For full uninstallation guide, refer to this.
Set model location
By default, Ollama models are stored at /usr/share/ollama/.ollama/models on Linux. However, since models are quite large often, it may be desired to change the location. You can set custom path by:
sudo systemctl edit ollamaAdd:
[Service]
Environment="OLLAMA_MODELS=/path/to/your/new/models/directory"
Then reload and restart:
sudo systemctl daemon-reload
sudo systemctl restart ollama
Install and run a model
First pull a model:
ollama pull <model> # e.g., ollama pull gemma3:4bThen run the model:
ollama run <model>Additionally, consider the following commands:
ollama ls               # List pulled models
ollama ps               # List running models
ollama stop <model>     # Stop a running model
ollama rm <model>       # Remove a model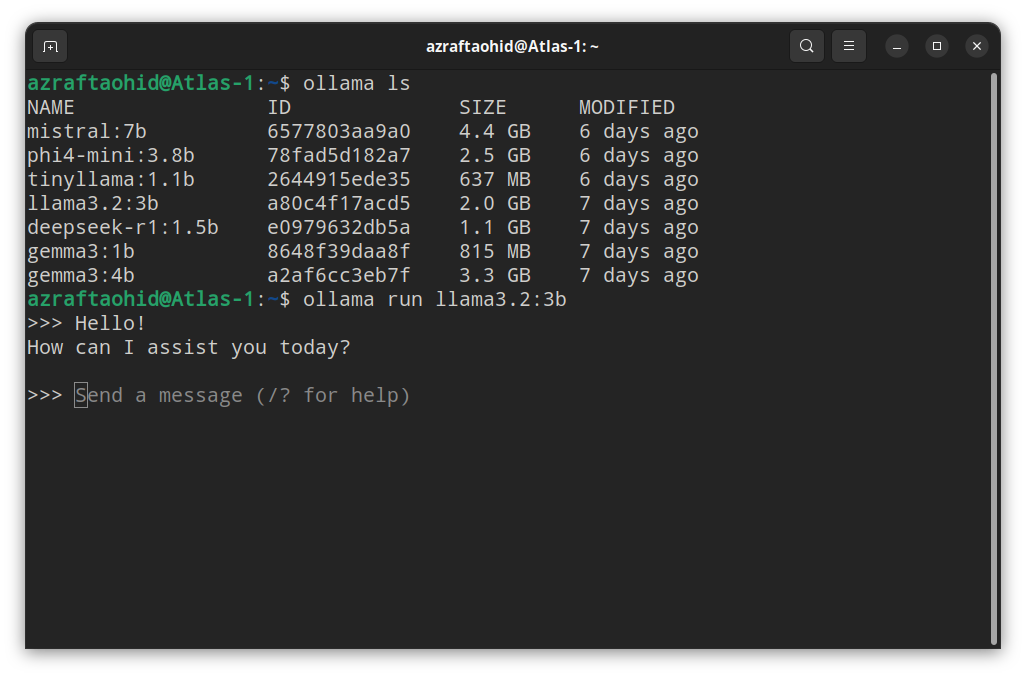
Exit Conversation
You can exit a conversation by either entering the prompt
/byeor by pressingCTRL+d.
Set custom system instructions
System instructions are persistent guidelines embedded into a model’s configuration. They influence how the model responds by setting personality or behavior rules.
You can define them by creating a Modelfile. For instance, save the following:
FROM gemma3:4b

PARAMETER num_gpu 25

SYSTEM """
- Get clarity: Ask clarifying questions if details are missing
- Tone: Use human tone — plain English, short phrases, avoid corporate jargon unless relevant
- Self-Critique Loop: After answers, re-check logic vs. frameworks
- Correct me: Flag flawed assumptions by me with data or logic
- Straight-forward: If you're unsure about something, say you can't compute it or ask for clarification
"""
Then create a customized model based on gemma3:4b:
ollama create gemma3-cs1 -f "/path/to/Modelfile"
ollama run gemma3-cs1
About Modelfile
A Modelfile is a configuration file that defines how a model should be built and behave. It can be based on an existing model, and you can tweak parameters like GPU allocation, context length, and default instructions.
Using Open Web-UI
A limitation of Ollama is that, when you run a model, it has no memory of conversations from earlier runs. This and for other reasons it is reasonable to integrate Ollama with Open Web-UI which provides an user-friendly web interface.
Open Web-UI can use the already installed Ollama instance and its models. So, no duplication would occur. It simply is a web app that interacts with Ollama APIs (and others, but this is valid only for what we’ll be doing).
I’ll cover two approaches to install Open Web-UI.
Install via Python
Create a Python virtual environment:
python3 -m venv /new/path/to/venv
source /new/path/to/venv/bin/activate
Then install:
pip install open-webuiAnd run:
open-webui serve --port 11000The web interface can be accessed by open localhost:11000 on web browser. This method is very simple and ideal for a quick-start.
Install via Docker Compose
If you’re comfortable with Docker, then this method is ideal. To do so, create a docker-compose.yml file under your desired directory:
services:
  openwebui:
    image: ghcr.io/open-webui/open-webui:main
    container_name: open-webui
    ports:
      - "11001:8080"
    volumes:
      - open-webui:/app/backend/data
    extra_hosts:
      - "host.docker.internal:host-gateway"
    restart: unless-stopped

volumes:
  open-webui:
Then run:
docker compose up -dOpen Web-UI should be accessible on localhost:11001 from your web browser.
Troubleshoot
Open Web-UI not connecting to Ollama when using Docker
This happens likely when Ollama is not listening on all network interfaces since the Open Web-UI docker container would need to communicate to host network from Docker’s internal network.
sudo ss -tlnp | grep 11434If you see 127.0.0.1:11434, it means Ollama only listening on 127.0.0.1 (localhost). If that’s the case, make Ollama listen on all ports:
sudo systemctl edit ollamaThen add under [Service]:
[Service]
Environment="OLLAMA_HOST=0.0.0.0"
Reload and restart:
sudo systemctl daemon-reload
sudo systemctl restart ollama
If that’s not the case, it may be because your firewall setting is preventing the communication. You can check UFW logs to identify from and to IP addresses that are being blocked:
sudo tail -f /var/log/ufw.logAlternatively, find Open Web-UI container’s Docker IP address by running:
docker network inspect open-webui_defaultLook for gateway. If the IP address is 172.22.0.1, then add the following UFW rule:
sudo ufw allow from 172.22.0.2 to 172.17.0.1